 Save
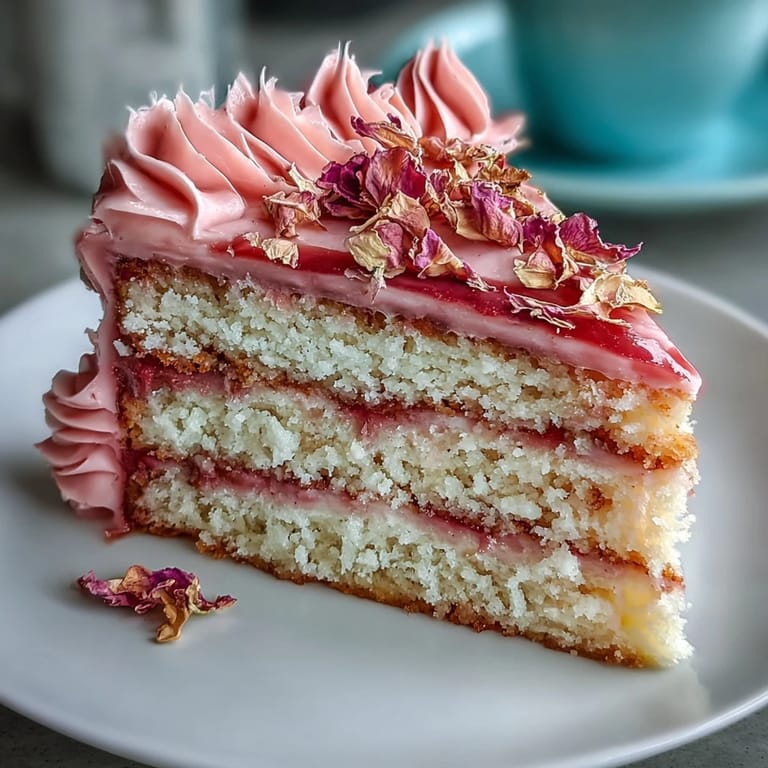
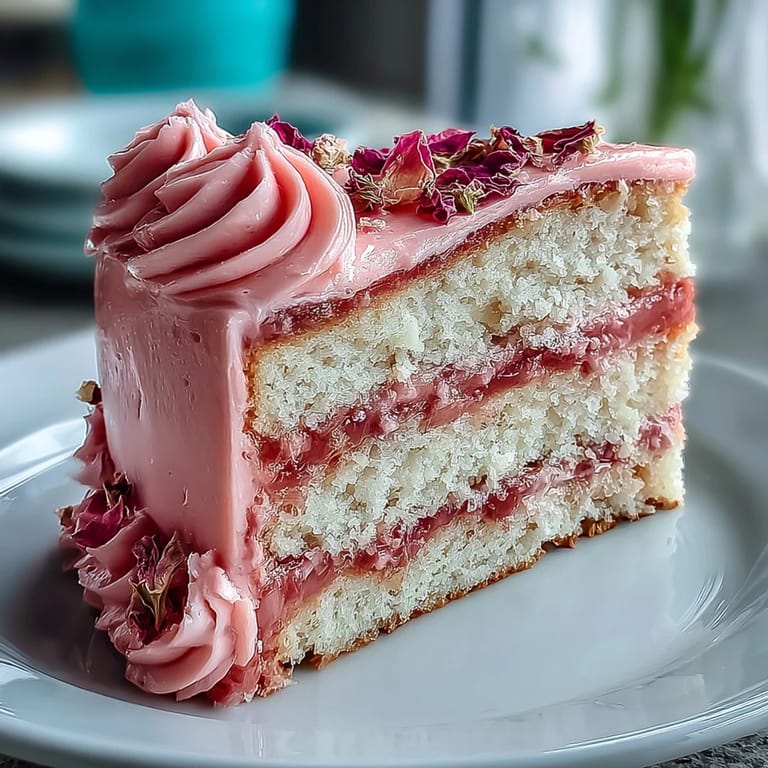
Save My sister texted me three weeks before Mother's Day with just a photo—a pale pink ombre cake she'd screenshotted from somewhere, with the message 'Can you make this?' I stared at those soft gradient layers and thought about how our mom always said pink reminded her of hope. Standing in my kitchen that Sunday morning, butter softening on the counter, I realized this cake wasn't just about impressing anyone; it was about turning something beautiful into something she could taste.
I made this cake for my neighbor's bridal shower last summer, and watching her eyes light up when she saw it reminded me why I bake in the first place. She took a photo before cutting into it, and later she told me it was the most beautiful dessert she'd ever had at an event. That compliment meant more than I expected—not because I needed validation, but because I'd created a moment where food became memory.
Ingredients
- All-purpose flour (2 ½ cups): The foundation of your sponge, and sifting it once with the baking powder helps distribute the leavening evenly without overmixing.
- Baking powder (2 ½ tsp): This is your lift; don't skimp or substitute, as it keeps the cake tender and airy.
- Salt (½ tsp): A small amount that makes the vanilla flavor sing and balances the sweetness.
- Unsalted butter (1 cup for sponge, 1 ½ cups for buttercream): Room temperature is non-negotiable; cold butter won't cream properly and you'll end up with a dense cake.
- Granulated sugar (2 cups): This creams with the butter to incorporate air, which is what makes the sponge fluffy.
- Large eggs (4): Room temperature eggs emulsify better with the butter-sugar mixture and blend more smoothly into the batter.
- Pure vanilla extract (1 tbsp for sponge, 2 tsp for buttercream): The soul of this cake; real vanilla makes all the difference in depth of flavor.
- Whole milk (1 cup): Also room temperature to prevent temperature shock when added to the creamed mixture.
- Powdered sugar (5 cups): Sift it before measuring so you're not incorporating lumps into your buttercream.
- Milk or heavy cream (2-3 tbsp): This adjusts the consistency of your buttercream; start with less and add as needed.
- Gel food coloring: Gel is superior to liquid because it won't thin out your buttercream, and the colors stay vibrant.
- Edible flowers: Violets, pansies, and rose petals add elegance; source from a specialty grocer or trusted online vendor.
Tired of Takeout? 🥡
Get 10 meals you can make faster than delivery arrives. Seriously.
One email. No spam. Unsubscribe anytime.
Instructions
- Prep your pans and preheat:
- Set your oven to 350°F and line three 8-inch round pans with parchment paper, pressing it into the corners. This step prevents sticking and ensures even baking, and starting with a properly preheated oven is crucial for rise.
- Combine dry ingredients:
- Whisk flour, baking powder, and salt together in a medium bowl. This distributes the leavening evenly and helps you avoid lumps later.
- Cream butter and sugar:
- Beat the softened butter and granulated sugar together on medium-high speed for 3 to 4 minutes until it looks pale, fluffy, and almost mousse-like. You're incorporating air here, which is what gives the cake its tender crumb.
- Add eggs and vanilla:
- Crack each egg into a small bowl first to check for shells, then add one at a time to the butter mixture, beating well after each addition before moving to the next. This ensures each egg fully incorporates and prevents the batter from looking separated.
- Build the batter alternately:
- Add the dry ingredients in three additions, alternating with the milk in two additions, and always starting and ending with the dry mixture. Mix on low speed and stop as soon as everything is just combined—overmixing at this stage toughens the cake.
- Divide and bake:
- Pour batter evenly into the three prepared pans and bake for 25 to 30 minutes, checking with a toothpick at the 25-minute mark. The top should spring back lightly when touched, and the toothpick should come out clean or with just a few moist crumbs.
- Cool properly:
- Let cakes rest in their pans for 10 minutes—this prevents them from cracking—then turn them out onto wire racks to cool completely at room temperature. Don't rush this step; warm frosting on warm cake will slide right off.
- Prepare the buttercream base:
- Beat room-temperature butter on high speed for 2 to 3 minutes until it's pale and creamy, then gradually add the sifted powdered sugar on low speed to avoid a cloud of sugar dust. Add vanilla and milk, then beat on high for another 3 minutes until light and fluffy.
- Create the ombre effect:
- Divide the buttercream into four equal portions. Leave one white, and add a tiny amount of gel food coloring to the next bowl for the lightest pink, more to the third for medium pink, and even more to the final bowl for the darkest pink. The key is going slowly with the coloring because gel is potent and you can always add more.
- Layer and frost:
- Place the first cake layer on your serving plate, then spread the darkest pink buttercream on top using an offset spatula. Add the second layer, spread the medium pink buttercream, then add the final layer and cover the top with the lightest pink, reserving the white buttercream for the sides.
- Smooth and blend:
- Use a clean offset spatula dipped in warm water to smooth the frosting, then gently blend the ombre colors where they meet on the sides with light vertical strokes. A bench scraper creates a polished look, but the spatula alone works beautifully.
- Decorate and chill:
- Arrange edible flowers on top and around the cake just before serving for maximum freshness and visual impact. Chill the finished cake for at least 30 minutes so the frosting sets and you get clean, beautiful slices.
 Save
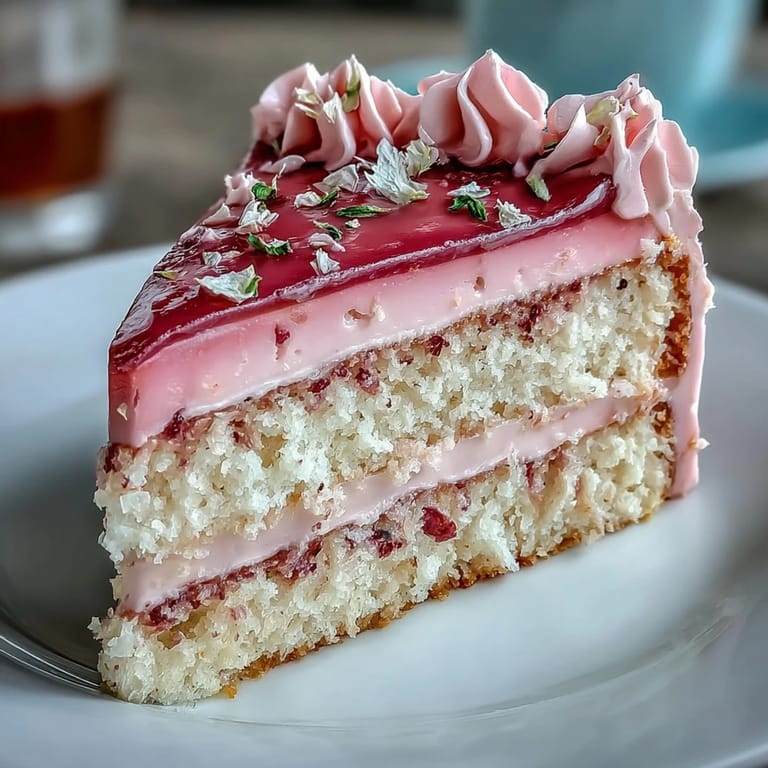
Save Last spring, I brought this cake to my office on my mom's birthday, and three coworkers asked for the recipe within an hour. One of them made it for her daughter's graduation party, and she sent me a photo of it on their dining room table surrounded by June sunshine. Knowing that one cake recipe created a ripple of joy through someone else's celebration changed how I think about the time I spend in my kitchen.
Secrets to a Showstopping Ombre
The ombre effect isn't about perfection—it's about gentle color transitions that catch the eye. The first time I made this, I was so worried about getting the gradient exactly right that I spent twenty minutes blending, and it looked overworked. The second time, I just let the colors sit in their natural stripes and used a bench scraper to soften the lines, and somehow it looked more intentional and elegant. The lesson I learned is that sometimes the cake knows what it wants to look like, and your job is just to guide it gently.
Why This Cake Works for Celebrations
There's something about a layered cake that makes people feel special, even if they're just eating it casually on a Tuesday afternoon. The vanilla sponge is familiar and comforting, but the ombre buttercream elevates it into something that feels like you spent all day baking. I've served this to people who claim they don't even like sweets, and they come back for seconds because the texture is so light and the flavor so clean.
Customization and Celebration Ideas
This cake is endlessly adaptable depending on who you're celebrating and what season you're in. In winter, I've used deeper wine tones for the ombre and added crystallized violets, while in summer I go for coral and peach with fresh garden pansies. You can also brush each cooled cake layer with a light simple syrup (equal parts sugar and water, cooled) before frosting to add extra moisture and flavor.
- For a lemon version, replace one teaspoon of vanilla extract with half a teaspoon of lemon oil and add fresh lemon zest to the buttercream.
- If you're celebrating someone who loves florals, infuse the buttercream with a tiny bit of rose or lavender extract instead of vanilla.
- Always remove non-edible flower toppers before serving, and double-check that all flowers are certified food-safe.
 Save
Save This cake is proof that something beautiful doesn't have to be complicated. Make it, serve it, watch people's faces light up, and remember that the best celebrations are the ones where someone made the effort to create something lovely just for you.
Recipe Q&A
- → How is the pink ombre effect achieved?
Different amounts of pink food coloring are added to separate bowls of buttercream, which are then layered from darkest to lightest to create the gradient effect.
- → Can I use fresh flowers for decoration?
Yes, fresh edible flowers like violets, pansies, or rose petals enhance the cake's presentation and freshness when added just before serving.
- → What is the best way to ensure moist sponge layers?
Brushing the cooled sponge layers with a simple syrup before applying buttercream adds extra moisture and flavor.
- → How long should I chill the cake before slicing?
Chill the completed cake for about 30 minutes to allow the buttercream to firm up for cleaner, neater slices.
- → Are there alternatives to food coloring for tinting buttercream?
Gel food coloring is preferred for vivid colors without thinning the buttercream, though natural colorants can be used with caution.