 Save
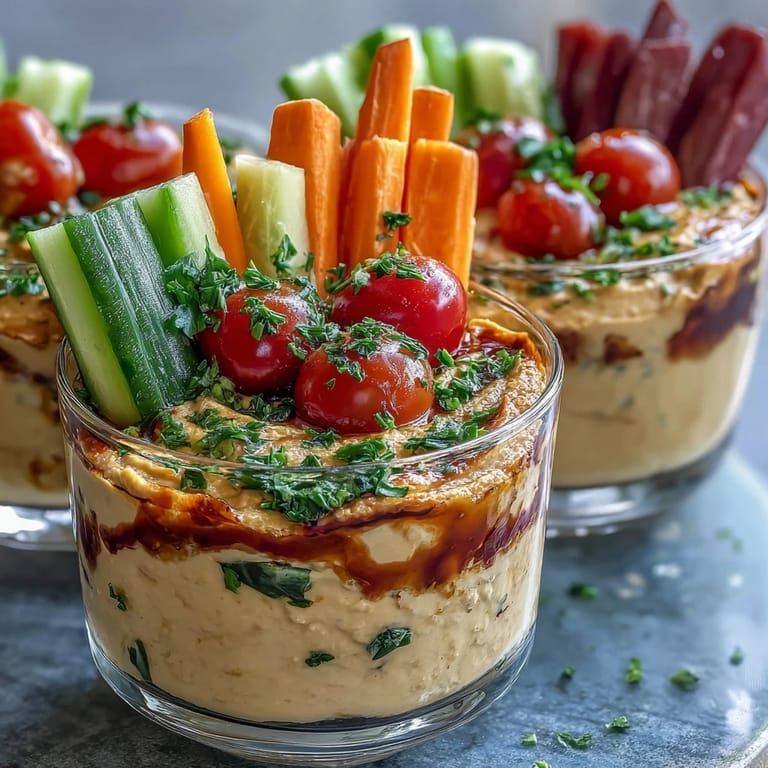
Save My daughter came home from school one afternoon with a crumpled permission slip for a field trip, and suddenly I was panicking about what to pack for lunch. Store-bought options felt uninspired, but then I remembered standing in a farmer's market, surrounded by the most gorgeous vegetables, and thought: why not make something she could actually look forward to eating? That's when these snack cups became our secret weapon—bright, colorful, and somehow more fun than anything wrapped in plastic.
I packed one of these cups for my son's soccer tournament last spring, and his coach asked me for the recipe afterward—he'd watched three kids trading snacks, and none of them wanted to part with theirs. That's when I knew I'd stumbled onto something that worked beyond just being healthy; it felt special somehow.
Ingredients
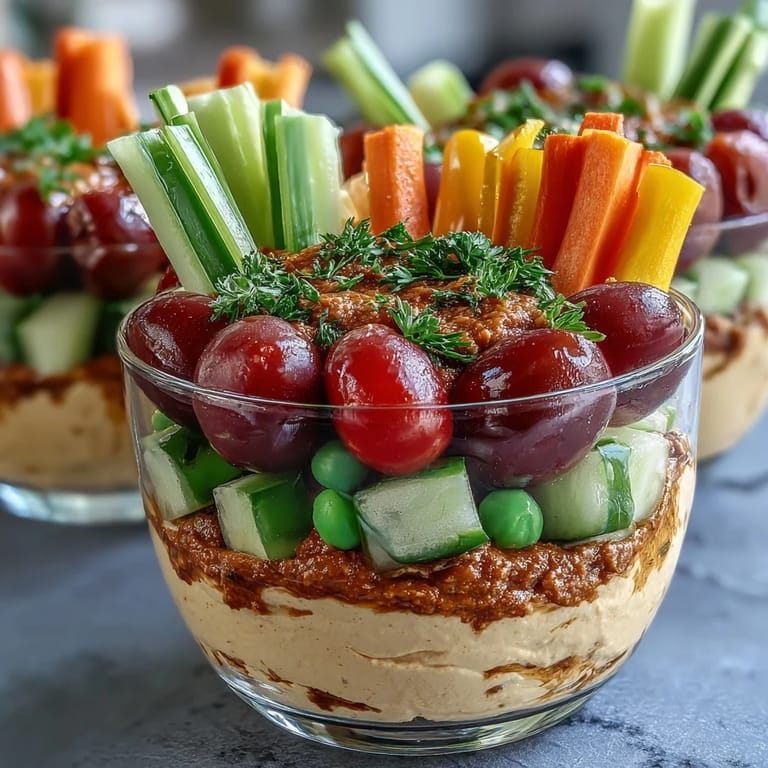
- Hummus: The creamy foundation that holds everything together—whether you buy it or make your own, it's worth choosing one with good flavor because it's the star here.
- Carrot: Sweet and snappy, these become almost candy-like when they're fresh and cut thick enough to stand on their own.
- Cucumber: The refreshing cool one in the bunch; cut them lengthwise so they're sturdy enough to stand upright without flopping.
- Red and yellow bell peppers: Pure sweetness and color—kids will eat peppers this way when they won't touch them any other way.
- Snap peas: These are the tiny treasures that disappear first; they're naturally sweet and require almost no prep.
- Cherry tomatoes: Round and jewel-like, they add brightness and a little burst of juice that balances the earthier veggies.
- Celery sticks: Optional but worth it for that satisfying crunch and the classic hummus pairing.
- Jicama sticks: If you can find it, this adds an unexpected crispness that feels almost like eating an apple.
Tired of Takeout? 🥡
Get 10 meals you can make faster than delivery arrives. Seriously.
One email. No spam. Unsubscribe anytime.
Instructions
- Wash and prep your vegetables:
- Run everything under cool water and pat dry—moisture is the enemy of freshness here. Cut your carrots and cucumbers lengthwise into sturdy sticks so they'll stand tall in the hummus instead of sinking.
- Divide the hummus:
- Spoon about 1/4 cup into each small container, smoothing the top gently with the back of your spoon. This becomes your edible base and your dip all in one.
- Arrange the vegetables:
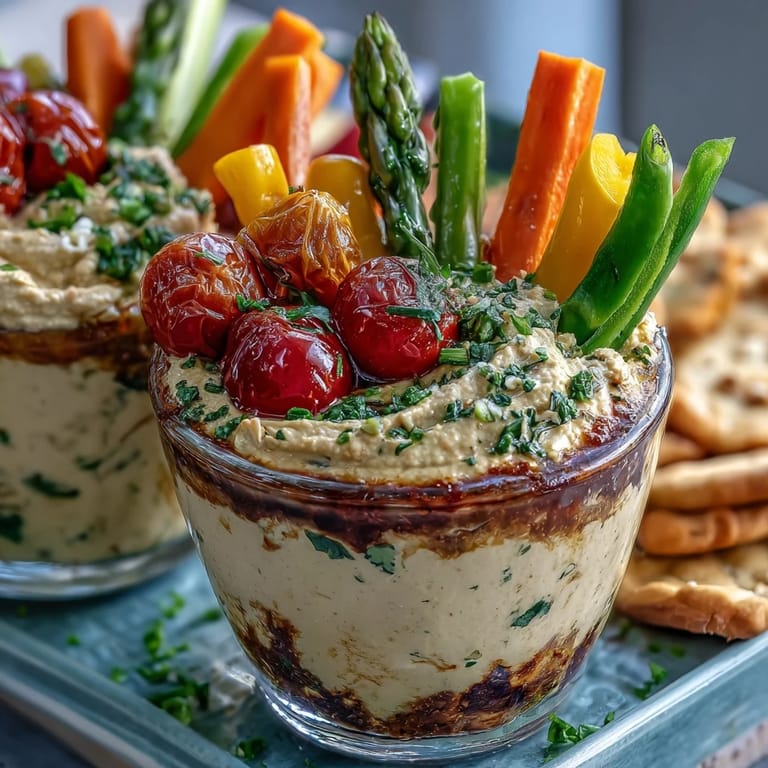
- Stand each veggie stick upright in the hummus like you're creating a little garden—mix the colors and textures so every cup looks inviting. The hummus will hold them in place while they travel.
- Seal and refrigerate:
- Cover each cup tightly and slide them into the fridge for up to 2 days. They're best enjoyed cold, so give them a quick chill before packing them in a lunchbox.
 Save
Save There was a moment when my nephew, who's notoriously picky, opened his snack cup at his desk and suddenly had three classmates asking what he was eating. He looked at me later and said these were way better than his usual snacks, and honestly, that meant more to me than any compliment about a fancy dinner ever could.
Flavor Variations That Actually Work
While I love the simplicity of plain hummus, sometimes I'll sprinkle a little paprika or za'atar on top—it catches the light and makes the cups look even more appealing. A tiny drizzle of good olive oil does the same thing, and it adds a richness that makes the whole experience feel more intentional.
Adapting by Season and What You Have
Summer deserves zucchini sticks and early radishes that taste almost like crunchy water. In fall, I switch to blanched green beans and thin slices of apple (toss them in a tiny bit of lemon juice so they don't brown). Winter is when I finally add celery, and spring brings baby asparagus tips that feel almost fancy.
Building Your Perfect Cup
The real magic happens when you stop thinking of this as just vegetables and hummus, and start thinking of it as your blank canvas. Mix in some roasted chickpeas for crunch, add a few cubes of cheese if dairy works for you, or swap the hummus for a white bean dip on days when you want something different. The framework stays the same, but the possibilities expand every time you open your vegetable drawer.
- Toast some chickpeas with spices if you want extra protein and crunch in the same bite.
- Keep backup vegetables frozen (like blanched broccoli) for emergency snack cup days.
- Label your cups with a small sticker if you're making them for a group with different preferences.
 Save
Save These cups have become our go-to for almost every adventure outside the house, and honestly, I love that something this simple brings so much joy. There's something beautiful about feeding people something that tastes good, looks good, and actually keeps them fueled.
Recipe Q&A
- → What vegetables work best in these snack cups?
Crunchy, fresh vegetables like carrots, cucumbers, bell peppers, snap peas, and cherry tomatoes provide texture and flavor that complement the creamy hummus.
- → How should I store the snack cups to keep them fresh?
Cover and refrigerate the snack cups in sealed containers or lids. Consume within 2 days for optimal freshness and crispness.
- → Can I customize the flavor of the hummus?
Yes, add a sprinkle of paprika, za’atar, or a drizzle of olive oil on top to enhance the hummus flavor before adding the vegetables.
- → Are these snack cups suitable for various dietary needs?
They fit vegetarian, gluten-free, and dairy-free preferences. Check store-bought hummus labels for allergens such as soy if needed.
- → Is cooking required to prepare these snack cups?
No cooking is necessary. Simply wash and cut fresh vegetables, add them to hummus in cups, and enjoy immediately or chilled.
- → Can additional protein be added to the snack cups?
Yes, consider adding baked tofu sticks or cheese cubes if not avoiding dairy, to boost protein content further.