 Save
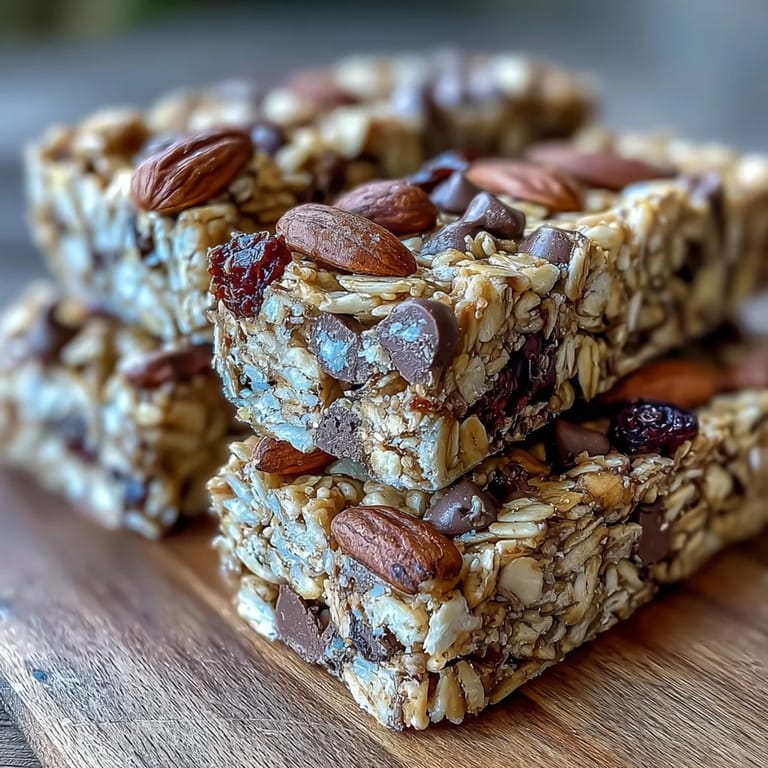
Save Last summer, my hiking buddy showed up with these no-bake bars tucked into her backpack, and I remember thinking how perfectly they solved the problem of finding actual food on the trail that wasn't wrapped in plastic or loaded with weird additives. One bite at the summit and I was hooked—chewy, substantial, nothing pretentious about them. She wouldn't share the recipe until the third time I asked, which made me laugh because it turned out to be absurdly simple. Now I make a batch whenever I'm packing for an adventure, but honestly, they disappear from my kitchen just as fast when friends realize what's in the box.
I brought these to a potluck once where someone had made these complicated gluten-free brownies that required three types of flour and a stand mixer, and watching people reach past them for my simple bars taught me something important about food—the best recipes are often the ones that let the ingredients speak for themselves instead of showing off. My neighbor asked for the recipe that night and now makes a batch every Sunday for her kids' school lunches, which somehow feels like the highest compliment I could get.
Ingredients
- Old-fashioned rolled oats (2 cups): Use the thick-cut ones, not instant—they hold texture when pressed and won't turn to mush. If you're gluten-sensitive, check that your container says certified gluten-free because even oats can carry contamination.
- Crisp rice cereal (1 cup): This adds crunch and helps bind everything together without making the bars dense or heavy.
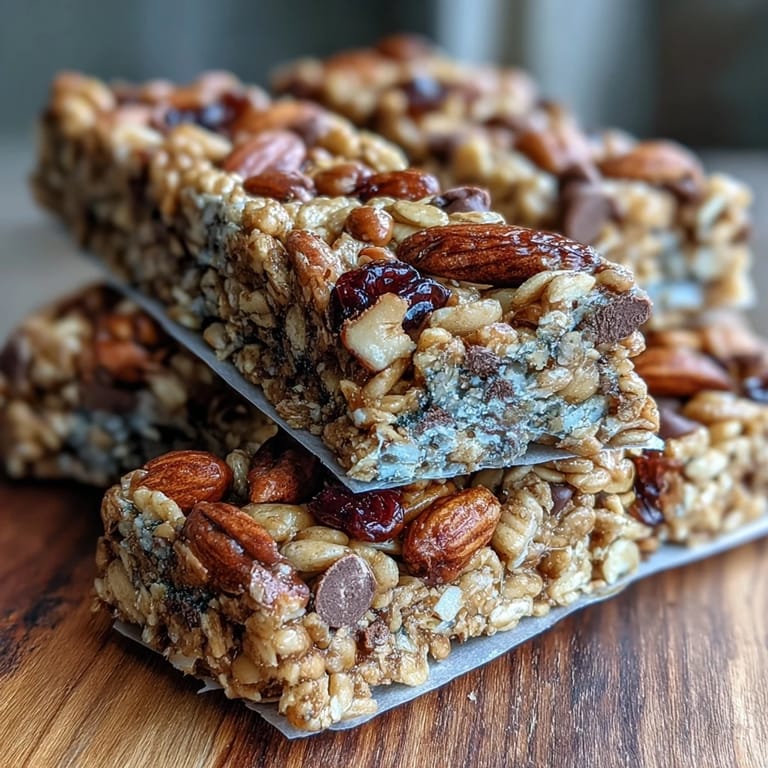
- Mixed nuts, chopped (1/2 cup): Whatever combination you like—almonds, walnuts, pecans, or hazelnuts if you're feeling fancy. Chop them roughly so you get little pockets of nutty texture in each bite.
- Dried fruit (1/2 cup): Cranberries, raisins, chopped apricots, or dates all work beautifully; avoid anything too sticky or it'll make the mixture difficult to press.
- Unsweetened shredded coconut (1/4 cup, optional): Adds a subtle tropical note and helps with texture, but leave it out if you don't love coconut or have allergies to consider.
- Salt (1/4 teaspoon): Just enough to wake up all the other flavors without making anyone ask what that taste is.
- Honey or maple syrup (1/2 cup): Honey gives a slightly richer sweetness and better binding, while maple syrup brings an earthier tone; either works, so go with what you have.
- Peanut butter or almond butter (1/3 cup): The creamy kind matters here because it blends smoothly; if you use natural nut butter, make sure there's no oil separation pooling on top, or drain it first.
- Vanilla extract (1 teaspoon): A small amount that rounds out the sweetness and makes everything taste more intentional.
- Mini chocolate chips (1/4 cup, optional): Add these only if you want them; they're not essential but they make the bars feel a little more indulgent without overpowering everything else.
Tired of Takeout? 🥡
Get 10 meals you can make faster than delivery arrives. Seriously.
One email. No spam. Unsubscribe anytime.
Instructions
- Line your pan and gather dry goods:
- Tear off a sheet of parchment paper and line your 8-inch square pan, leaving some overhang on two sides so you can lift the whole batch out later without wrestling with it. In a big bowl, toss together your oats, rice cereal, chopped nuts, dried fruit, coconut if you're using it, and that tiny pinch of salt—the mixing here is just to combine, nothing fancy needed.
- Warm the wet ingredients until smooth:
- Set a small saucepan over low heat and add your honey and nut butter together, stirring gently for about two to three minutes until they're completely melted and silky. Once it's smooth, take it off heat right away and stir in the vanilla, which should smell like a warm hug.
- Combine everything and fold gently:
- Pour that warm mixture over your dry ingredients and start mixing with a spatula or sturdy spoon, working from the bottom of the bowl and bringing everything up and over until every oat and nut piece is coated. This is when you'll see the magic happen—the sticky binder envelops all those textures and it starts looking like actual bars instead of scattered ingredients.
- Add chocolate chips without melting them:
- If you're using chocolate chips, wait a few minutes for the mixture to cool slightly, then stir them in gently so they don't completely melt into ribbons. You want them to stay as distinct little pockets of chocolate, not dissolve into the whole thing.
- Press into the pan with intention:
- Transfer everything into your parchment-lined pan and use a spatula or the flat bottom of a measuring cup to press it down firmly and evenly—this step determines whether your bars will be chewy or crumbly, so take your time and make sure there are no air pockets hiding underneath. If you want them studded with extra chocolate or nuts on top, sprinkle those now and press them in gently so they stick.
- Chill until firm:
- Pop the whole pan into the refrigerator for at least an hour, though two hours is even better if you have the patience. The bars need this time to set properly and become sliceable instead of falling apart when you cut them.
- Cut and store:
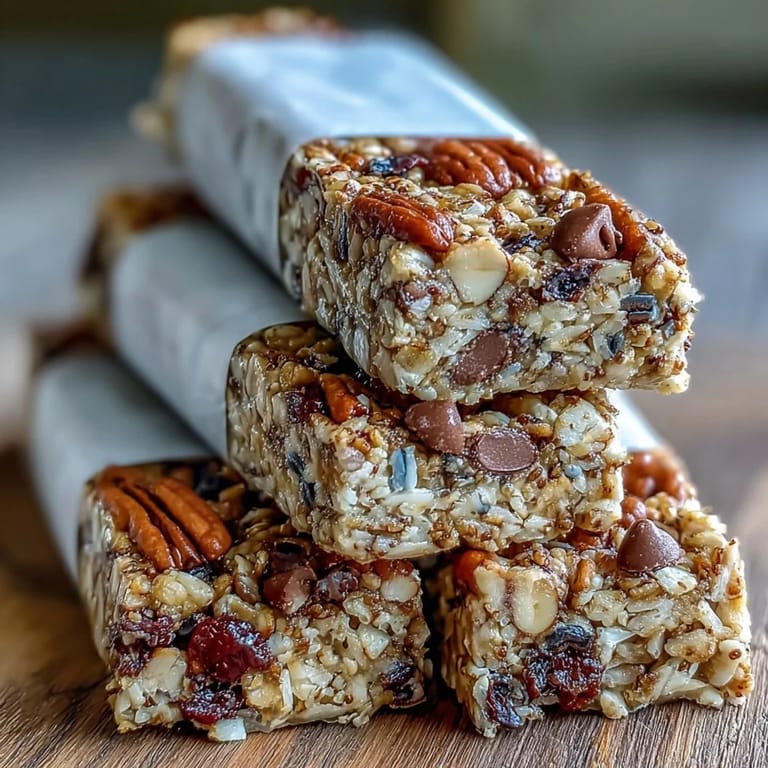
- Grab those parchment overhang tabs and pull the whole block out of the pan onto a cutting board, then use a sharp knife to cut into twelve roughly equal bars. Store them in an airtight container in the refrigerator where they'll keep for about a week, though in my experience they rarely make it past three days.
 Save
Save There's something deeply satisfying about handing someone a bar wrapped in wax paper and seeing their face when they realize it's homemade and doesn't taste like a protein shake in bar form. That moment when good food becomes a small gift is really why I keep making these.
Customizing Your Bars
The beauty of these bars is that they're a canvas for whatever you have in your pantry or whatever your taste buds are craving that day. I've made them with crushed pretzels for salt lovers, stirred in pumpkin pie spice one fall when I was thinking about autumn, swapped the chocolate chips for white chocolate once and never looked back. The ratio of oats to binder stays the same, but the flavors can shift dramatically depending on what you layer in, so don't be timid about experimenting once you've made them once.
Nut-Free and Dietary Swaps
If peanut allergies are a concern in your household or friend group, sunflower seed butter works beautifully as a one-to-one replacement and honestly tastes just as rich when you're eating the finished bar. For vegan versions, stick with maple syrup instead of honey and use dairy-free chocolate chips or skip the chocolate entirely in favor of extra dried fruit or seeds. Gluten-free folks should make sure both your oats and rice cereal say certified gluten-free on the package, and suddenly these become a completely safe snack option.
Why These Work for Every Situation
I've thrown these into hiking backpacks, packed them in school lunches, served them at breakfast with coffee when I wanted something more interesting than toast, and even offered them at a book club where they disappeared faster than the actual snacks I'd planned. They're not too sweet, they're not fancy enough to feel like they need an occasion, and they're solid enough that they won't crumble in your bag or turn to mush in your pocket. Most importantly, they taste like someone cared enough to make them, which is probably why people keep asking for the recipe.
- Make a double batch and freeze half in the freezer for unexpected moments when you need a snack that feels thoughtful.
- These pair perfectly with a thermos of tea or coffee on mornings when you're not ready to sit down for breakfast.
- Wrap extras individually in wax paper and keep them in a tin at work for the 3 p.m. energy slump that hits everyone.
 Save
Save These bars live in that perfect space where wholesome nutrition feels like an actual treat, and that's exactly why they've become my go-to for basically every situation that requires a snack worth remembering. Make them once and you'll understand why my friend guards the recipe so fiercely.
Recipe Q&A
- → How do I make these granola bars without baking?
Mix dry ingredients with a warm honey and nut butter blend, then press into a pan and chill until firm.
- → Can I substitute peanut butter for another spread?
Yes, sunflower seed butter works well for a nut-free version while maintaining creamy texture.
- → What optional add-ins can enhance flavor and texture?
Mini chocolate chips, chia seeds, flaxseed meal, or a sprinkle of cinnamon add variety and nutritional boosts.
- → How long do these bars keep in the fridge?
Store them in an airtight container for up to one week to maintain freshness and firmness.
- → Are these bars suitable for vegans?
Yes, using maple syrup and dairy-free chocolate chips makes them a vegan-friendly snack.