 Save
Save My neighbor Sarah showed up at my door one March afternoon with a box of Cadbury mini eggs she'd picked up early, grinning like she'd found treasure. She wanted to do something different with them beyond just eating them straight from the box, and honestly, I was skeptical—until we started folding those little chocolate gems into cookie dough and the kitchen filled with this warm, buttery, spring-like smell. These bars became our unexpected tradition that year, soft and chewy with pockets of chocolate that would melt on your tongue. Now every Easter season, someone asks me to make them.
I brought a pan of these to my daughter's kindergarten Easter party, and watching those kids' faces light up when they bit into the melted Cadbury chocolate was worth every minute of prep. One little boy came back for seconds and asked his mom why his homemade cookies never looked this pretty—she laughed and asked me for the recipe right there, parchment paper still stuck to the bottom of the pan.
Ingredients
- All-purpose flour (2 1/4 cups): The foundation that keeps these bars from spreading too thin; make sure it's fresh and measured correctly or they'll turn out cakey instead of chewy.
- Baking soda (1 tsp): This is what gives them that tender crumb and helps them spread just enough—don't skip it.
- Salt (1/2 tsp): A pinch that makes the chocolate flavor pop and balances the sweetness.
- Unsalted butter, melted (3/4 cup): Melting it first creates a different texture than creaming, giving you that signature chewy bite instead of cakey density.
- Light brown sugar (1 cup, packed): The molasses in brown sugar is what makes these bars so soft and keeps them that way for days.
- Granulated sugar (1/2 cup): This helps with structure and gives the edges that gentle golden crispness you want.
- Eggs (2 large, room temperature): Cold eggs won't mix smoothly, and you need that smooth batter for even baking.
- Pure vanilla extract (2 tsp): Don't use imitation here; it makes a real difference in flavor depth.
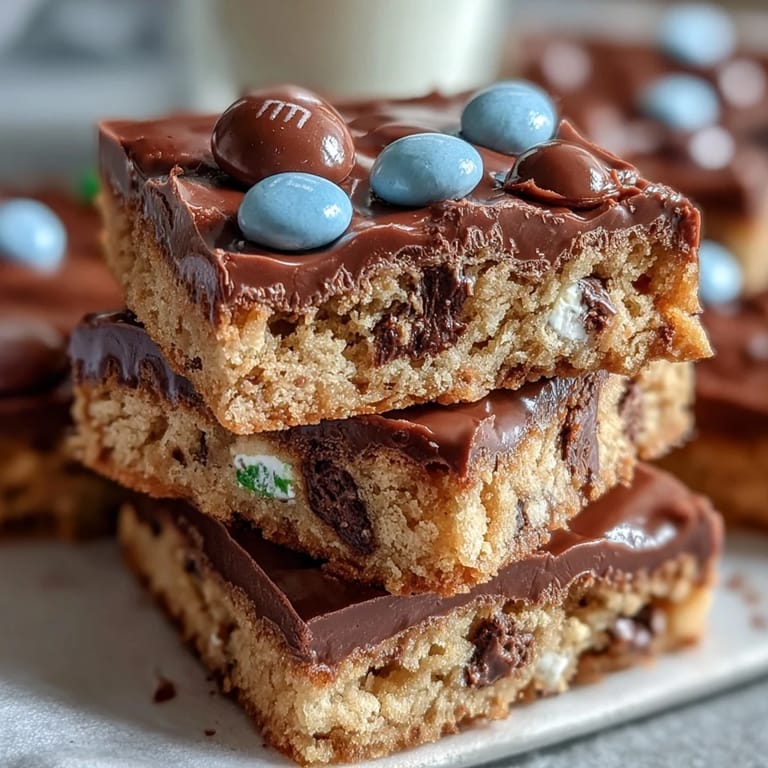
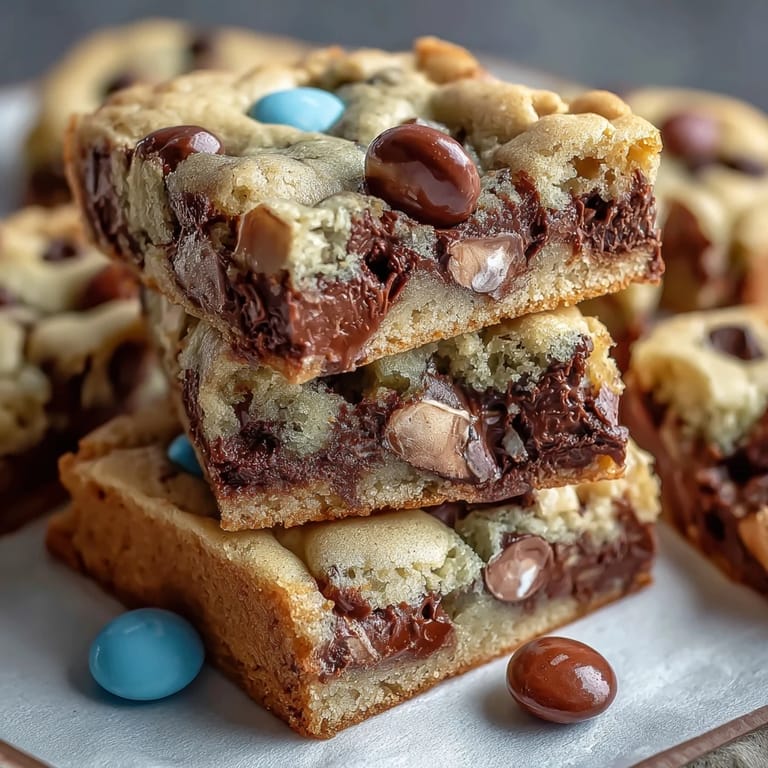
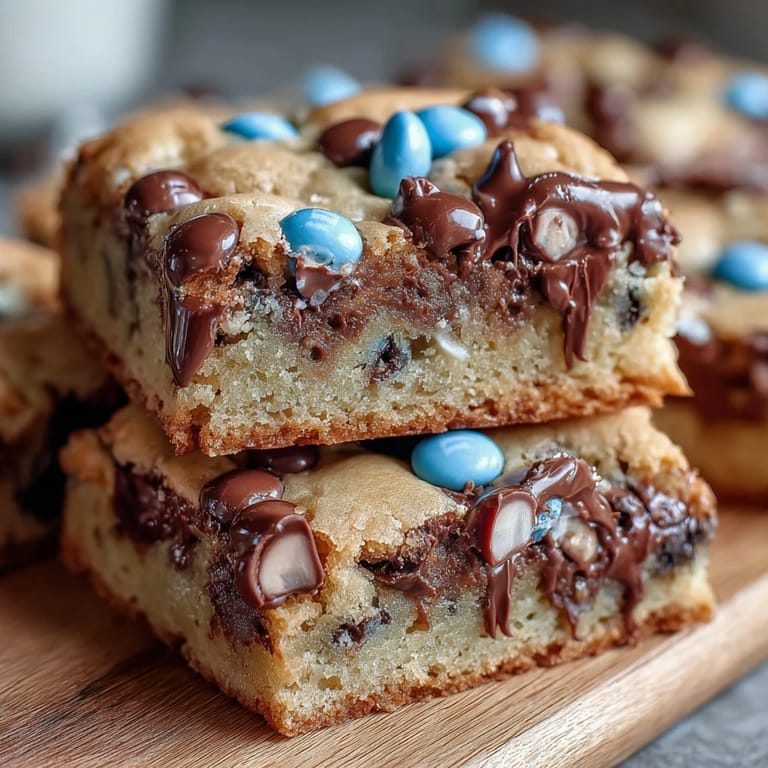
- Cadbury mini eggs (1 cup, chopped): Chop them roughly so you get chocolate chunks throughout rather than dust, and honestly, the Cadbury ones have this specific creaminess that's hard to replicate.
- Pastel M&Ms (1 cup): Save some for the top before mixing; they look beautiful scattered across the surface and give you those little flavor bursts.
Tired of Takeout? 🥡
Get 10 meals you can make faster than delivery arrives. Seriously.
One email. No spam. Unsubscribe anytime.
Instructions
- Prep your pan like you mean it:
- Get your oven heating to 350°F and line that 9x13-inch pan with parchment paper, leaving some hanging over the edges so you can lift everything out later. This small step saves you from frustration when the bars are cool and you're trying to slice them.
- Combine your dry team:
- Whisk together the flour, baking soda, and salt in a medium bowl, making sure there are no lumps of baking soda hiding in there. Set it aside and forget about it for a moment.
- Build the wet base:
- In your large bowl, whisk the melted butter with both sugars until it looks smooth and slightly glossy. This takes about a minute and feels good, almost meditative.
- Add the eggs carefully:
- Crack in your room-temperature eggs and pour in the vanilla, then whisk everything together until it's pale and well combined. Room temperature eggs make a difference here—they mix in smoother and create a better texture overall.
- Fold the dry into the wet:
- Using a spatula, gently fold the flour mixture into the wet ingredients, stirring just until you don't see streaks of flour anymore. Overmixing creates tough bars, so resist the urge to keep stirring once it comes together.
- Fold in your chocolate treasures:
- Add the chopped Cadbury eggs and half of the M&Ms, folding gently so they're distributed throughout. Some people chop the eggs smaller and some leave them chunky—I like chunky because you really get that chocolate hit.
- Spread and decorate:
- Pour the dough into your prepared pan and smooth it out into an even layer with your spatula. Scatter the remaining M&Ms and a few extra mini egg pieces across the top so they get slightly pressed in and stay put during baking.
- Bake with patience:
- Bake for 23 to 26 minutes—the edges should be golden brown and the center should look just barely set, maybe even slightly underdone in the very middle. This is the secret to keeping them chewy; overbaking is the enemy here.
- Cool completely before cutting:
- Let them sit in the pan on a wire rack until they're completely cool—this usually takes about an hour. If you cut them while they're warm, they'll fall apart, so this step requires real patience even though the smell is driving you crazy.
 Save
Save My kitchen smelled like spring when I pulled these from the oven last year, and my husband came downstairs asking what I was making before he even saw them. Sharing warm bars with someone who genuinely loves chocolate and color and softness—that's when these stopped being just a recipe and became something that brings people together.
Why These Bars Beat Regular Cookie Recipes
There's something about mixing add-ins like Cadbury eggs and M&Ms into a bar cookie base instead of making drop cookies—the bars hold together better, they're easier to portion, and you get a more consistent experience in every bite. You're not dealing with cookies spreading unevenly on a sheet pan or trying to figure out if they're done; you just bake one pan and let the oven do the work. Plus, the bars stay softer longer because they're less exposed to air, which means you can make them the day before and they'll still taste fresh for your gathering.
The Easter Candy Question
I've tried substituting different candies when I couldn't find the exact ones, and while it works, there's genuinely something special about Cadbury mini eggs—they're smoother and creamier than most other chocolate-covered candies, and they melt in a way that feels luxurious in a bar cookie. Pastel M&Ms are easier to swap out, and honestly, regular M&Ms work fine if you want less of a spring vibe. The key is using candies with enough structural integrity to survive the folding and baking process without completely dissolving or burning.
Storage and Make-Ahead Magic
These bars keep beautifully in an airtight container at room temperature for up to four days, which makes them perfect for baking ahead if you're hosting a party or sending treats to someone. I've also frozen them in a single layer before stacking them in a freezer bag, and they thaw perfectly in about 30 minutes without losing that soft, chewy texture. If you like them even gooier, slightly underbake them and store them with a piece of bread in the container—the bars will soften even more as they sit, and the bread will actually keep them moist without making them soggy.
- Cool the bars completely before storing or they'll sweat moisture and become sticky.
- Layer parchment paper between stacked bars if you're stacking them in a container.
- Let frozen bars come to room temperature before unwrapping so condensation doesn't stick to the surface.
 Save
Save These bars have become my go-to when I want to make something that feels special without spending hours in the kitchen. There's real joy in seeing someone's face light up when they realize there's chocolate candy folded throughout, and honestly, that's the whole point of baking.
Recipe Q&A
- → How can I ensure the bars stay soft and chewy?
Underbaking slightly and avoiding overmixing the dough helps maintain a tender, chewy texture.
- → Can I substitute the Cadbury mini eggs or pastel M&Ms?
Yes, mini chocolate eggs or regular M&Ms can be used if the original candies aren't available.
- → What is the best way to store these bars?
Keep the bars in an airtight container at room temperature to preserve freshness for up to four days.
- → Are these bars suitable for vegetarians?
Yes, the ingredients used are vegetarian-friendly.
- → Any tips for preparing the baking pan?
Line a 9x13-inch pan with parchment paper allowing some overhang to easily lift the bars after baking.