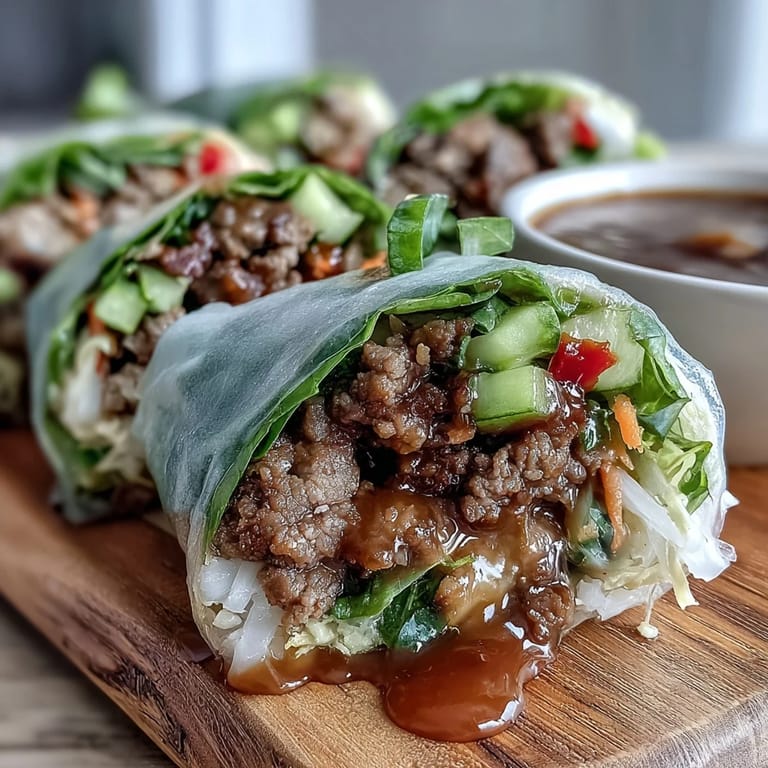
Thai Basil Beef Rolls

Featured in: Quick Snacks & Starters

These vibrant Thai-inspired rolls combine savory ground beef seasoned with garlic, shallots, and aromatic Thai basil, nestled among crisp vegetables and fragrant herbs. The filling gets its depth from a balanced sauce of soy, fish sauce, and palm sugar, creating layers of salty, sweet, and spicy notes. Wrapped in delicate rice paper with cucumber, carrots, and lettuce, each roll offers satisfying crunch and freshness. A homemade dipping sauce amplifies the bright flavors with lime, chili, and fish sauce. Perfect for gatherings or meal prep, these rolls come together in under an hour and deliver restaurant-quality results at home.

Updated on Sun, 01 Feb 2026 16:44:00 GMT
Freshly rolled Thai Basil Beef bites, filled with savory beef and crisp veggies, ready to dip in tangy sauce. Save
Freshly rolled Thai Basil Beef bites, filled with savory beef and crisp veggies, ready to dip in tangy sauce. | brilliantcrust.com

The first time I attempted rice paper rolls, my kitchen looked like a disaster zone. Stuck together wrappers, filling everywhere, and what were supposed to be elegant rolls looked like sad burritos. But there is something so satisfying about mastering the technique—when you get that perfect tight roll and take that first bite of crisp vegetables, fragrant beef, and fresh herbs all at once.

I made these for a summer potluck last year, watching skeptics turn into converts after their first taste. The beef filling, warm with spices and basil, creates such a welcoming aroma that people were gathering around my kitchen before I even finished rolling. Something about fresh spring rolls just makes people slow down and really enjoy their food.

Ingredients

  • Ground beef: I use 85 to 90% lean because you want enough fat to keep the filling juicy and flavorful, but not so much that it makes your rolls greasy
  • Thai basil: This is non-negotiable for authentic flavor with its slight anise notes, though in a pinch I have used sweet basil with extra mint
  • Rice paper wrappers: Buy the larger 8.5 inch size because smaller ones will frustrate you with tearing and overstuffing
  • Fish sauce: This provides that essential salty umami base—you cannot substitute it with soy sauce and expect the same depth
  • Fresh herbs: Do not skimp here because the combination of basil, cilantro, and mint is what makes these taste bright and alive

Instructions

Product image
Slice meats, cheeses, and bread evenly for sandwiches, charcuterie boards, and precise meal prep.
Check price on Amazon
Mix the sauce seasoning:
Whisk together the soy sauce, fish sauce, oyster sauce, dark soy sauce, and sugar until completely dissolved, adding just enough water to make it pourable
Cook the aromatics:
Heat oil in a wok over medium-high heat and stir-fry the garlic and shallot until just golden, about 30 to 45 seconds
Add heat and aromatics:
Toss in the minced chilies and white parts of the green onions, cooking until the kitchen fills with that spicy fragrance
Brown the beef:
Add the ground beef, breaking it apart with your spatula and cooking until browned with some crispy spots, 4 to 6 minutes
Soften the peppers:
Stir in the diced red bell pepper and let it cook for a couple of minutes until it starts to soften
Season the beef:
Pour in your sauce mixture and toss everything together, letting it reduce until it clings beautifully to the meat
Finish with basil:
Reduce heat to low, add the chopped Thai basil and green onion tops, and toss just until the basil wilts
Add brightness and cool:
Stir in the fresh lime juice, then remove from heat and let the filling cool completely—this is crucial for preventing torn wrappers
Make the dipping sauce:
Combine fish sauce, lime juice, sugar, and water, stirring until dissolved, then add garlic, chilies, and any optional garnishes
Set up your station:
Arrange all your prepared vegetables, herbs, cooled rice or noodles, and beef filling in separate bowls within reach
Soften the rice paper:
Dip each wrapper in warm water for 3 to 5 seconds, turning it to moisten all sides, then place it on your board
Layer your fillings:
Pile rice or noodles on the bottom third, add beef, then arrange your vegetables and herbs in a neat line
Roll it up:
Fold the bottom over the filling, tuck in the sides, and roll tightly away from you, keeping everything snug
Serve:
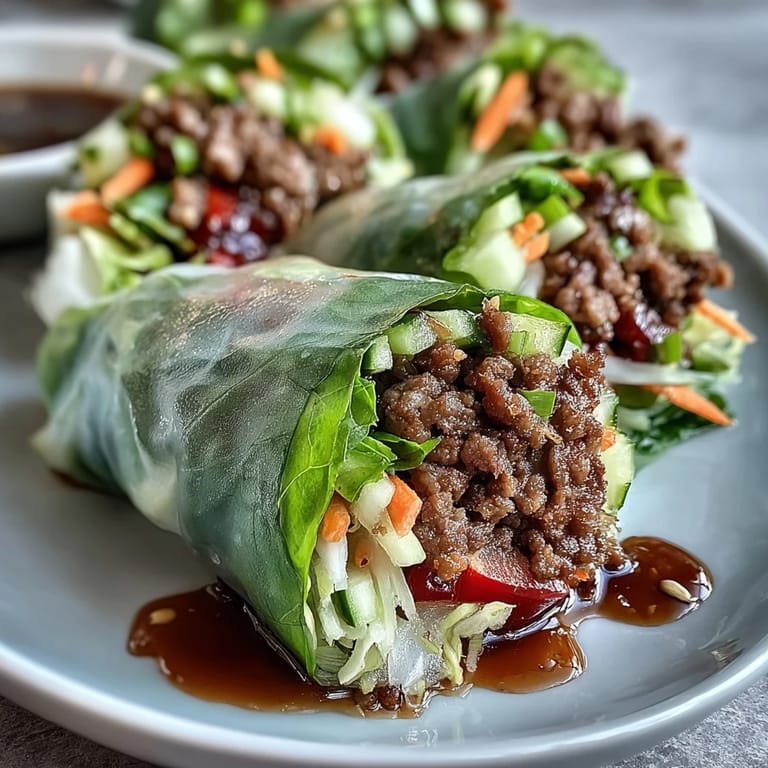
Cut diagonally if you want to show off the beautiful layers inside, or leave whole and serve with the dipping sauce
Product image
Slice meats, cheeses, and bread evenly for sandwiches, charcuterie boards, and precise meal prep.
Check price on Amazon
Thai Basil Beef Rolls wrapped in soft rice paper, piled with julienned cucumber, carrots, and fresh herbs. Save
Thai Basil Beef Rolls wrapped in soft rice paper, piled with julienned cucumber, carrots, and fresh herbs. | brilliantcrust.com

These rolls have become my signature contribution to gatherings because they look impressive but are actually quite forgiving once you understand the rhythm. I love watching people is face light up when they bite through that soft wrapper into all those layers of flavor and texture.

Mastering the Rice Paper

The biggest mistake I see with rice paper is over-soaking. You want to dip quickly and let it continue softening on your board as you work. If it is still slightly stiff when you start rolling, that is actually perfect—it will finish softening as you add fillings and fold.

Assembly Efficiency

I have learned to set up an assembly line with everything in order of use. The first few rolls might be awkward, but by the third or fourth you will develop a rhythm and suddenly these become almost meditative to make.

Make-Ahead Strategy

The beef filling actually tastes better the next day as the flavors meld together. You can cook it up to 2 days ahead and store it in the refrigerator. Just bring it back to room temperature before rolling so it does not make condensation inside your wrappers.

  • Roll these no more than 3 hours before serving or the rice paper starts to toughen
  • Keep finished rolls under a barely damp towel and plastic wrap to prevent drying out
  • Let refrigerated rolls sit at room temperature for 15 minutes before serving for the best texture
Product image
Prep ingredients, rinse produce, and dry dishes efficiently with a built-in workstation designed for streamlined cooking.
Check price on Amazon
Warm Thai Basil Beef Rolls on a platter, garnished with Thai basil leaves and a side of spicy dipping sauce. Save
Warm Thai Basil Beef Rolls on a platter, garnished with Thai basil leaves and a side of spicy dipping sauce. | brilliantcrust.com

There is something so rewarding about biting into a roll you have made yourself—crisp, fresh, and packed with layers of flavor. These Thai Basil Beef Rolls might take a little practice, but they are worth every minute.

Recipe Q&A

Can I make these rolls ahead of time?

Yes, you can prepare the beef filling up to 2 days in advance and store it refrigerated. Assembly is best done within 2-3 hours of serving for optimal texture. If storing assembled rolls, cover with a damp towel and plastic wrap to prevent drying. Let them sit at room temperature for 10-15 minutes before serving.

What can I substitute for Thai basil?

Thai basil has distinct anise-like notes, but you can use sweet Italian basil combined with a hint of mint to approximate the flavor. Fresh mint leaves work well as a partial substitute. The flavor profile will shift slightly but remains delicious.

Are these rolls gluten-free?

Yes, they can be made gluten-free by using tamari instead of soy sauce and ensuring your oyster sauce is certified gluten-free. Rice paper wrappers are naturally gluten-free. Always check labels on fish sauce and condiments to verify they meet your dietary needs.

How do I prevent rice paper from tearing?

Use warm—not hot—water and dip briefly for 3-5 seconds. The paper continues softening as you work. Place on a lightly oiled surface to prevent sticking. Don't overfill, and roll firmly but gently. If papers feel too stiff, let them sit 30 seconds longer before filling.

Can I use a different protein?

Ground turkey, chicken, or pork work excellently with these seasonings. For a vegetarian version, use crumbled tofu or textured vegetable protein, adjusting cooking time accordingly. The sauce flavors pair well with various proteins.

What vegetables work best in these rolls?

Julienne carrots, cucumber, and cabbage provide classic crunch. You can add bean sprouts, sliced radishes, red bell pepper strips, or shredded green papaya. Keep pieces uniform for even rolling and consistent texture throughout.

Thai Basil Beef Rolls

Savory beef with Thai basil and fresh vegetables wrapped in soft rice paper, served with zesty dipping sauce.

Time to prep
30 min
Time to cook
15 min
Overall time
45 min
Created by Isabella Davis


Skill level Medium

Culinary roots Thai

Makes 4 Number of servings

Diet considerations No dairy

What you'll need

Beef Filling

01 1 lb ground beef, 85–90% lean
02 1 tablespoon neutral oil
03 3 cloves garlic, minced
04 1 small shallot, finely minced
05 2 Thai bird's eye chilies, finely minced
06 1 small red bell pepper, finely diced
07 3 green onions, thinly sliced
08 1 cup fresh Thai basil leaves, roughly chopped
09 1 tablespoon fresh lime juice

Sauce Seasoning

01 1.5 tablespoons soy sauce
02 1 tablespoon fish sauce
03 0.5 tablespoon oyster sauce
04 1 teaspoon dark soy sauce
05 2–3 teaspoons brown sugar
06 1–2 tablespoons water

Rolls Assembly

01 12–16 large rice paper wrappers, 8.5 inch diameter
02 1.5 cups cooked jasmine rice or rice vermicelli noodles, cooled
03 1 cup shredded lettuce or thinly sliced cabbage
04 1 cup julienned cucumber, seeds removed
05 1 cup julienned carrots
06 1 cup fresh cilantro leaves
07 1 cup additional Thai basil leaves
08 1 cup fresh mint leaves
09 Warm water for softening rice paper

Dipping Sauce

01 3 tablespoons fish sauce
02 3 tablespoons fresh lime juice
03 2.5 tablespoons warm water
04 1.5 tablespoons sugar
05 1 clove garlic, finely minced
06 1–2 Thai bird's eye chilies, thinly sliced
07 1 tablespoon finely shredded carrot
08 1 teaspoon finely chopped cilantro stems

How To Make It

Step 01

Prepare Sauce Seasoning: Combine soy sauce, fish sauce, oyster sauce, dark soy sauce, and brown sugar in a small bowl. Stir until sugar dissolves completely. Add water to achieve a glossy, pourable consistency. Set aside.

Step 02

Aromatics Foundation: Heat 1 tablespoon neutral oil in a large skillet or wok over medium-high heat. Add minced garlic and shallot, stirring frequently for 30–45 seconds until fragrant and lightly golden.

Step 03

Infuse Chilies and Green Onions: Add minced chilies and the white portions of sliced green onions. Stir-fry for 20–30 seconds until the mixture becomes aromatic.

Step 04

Cook Ground Beef: Add ground beef to the skillet, breaking it apart with a spatula as it cooks. Stir frequently for 4–6 minutes until mostly cooked through with light browning throughout.

Step 05

Add Vegetables: Stir in the diced red bell pepper and cook for 2–3 minutes until slightly softened but still maintaining some texture.

Step 06

Coat with Sauce: Pour the prepared sauce seasoning over the beef mixture. Toss thoroughly to coat evenly and cook for 2–3 minutes more, allowing the sauce to reduce and cling to the beef. Adjust seasoning as needed.

Step 07

Finish with Fresh Herbs: Reduce heat to low. Add the chopped Thai basil and green portions of green onions, tossing gently for 30–45 seconds just until the basil wilts slightly.

Step 08

Cool Beef Filling: Remove from heat and stir in fresh lime juice. Transfer to a bowl and allow the beef mixture to cool completely to room temperature.

Step 09

Prepare Components: While beef cools, cook rice or noodles if using and cool completely. Prepare all vegetables and herbs, arranging them in separate bowls for efficient assembly.

Step 10

Make Dipping Sauce: In a bowl, combine fish sauce, lime juice, sugar, and warm water. Stir until sugar dissolves completely. Add minced garlic, sliced chilies, shredded carrot, and chopped cilantro stems. Taste and balance the flavors—aiming for equal parts salty, sour, sweet, and spicy. Chill if desired.

Step 11

Set Up Rolling Station: Fill a large shallow dish with warm water, not hot. Prepare a clean board or large plate, lightly coating with oil if the wrappers stick easily.

Step 12

Soften Rice Paper: Working with one wrapper at a time, dip it into the warm water for 3–5 seconds, rotating gently to moisten all surfaces evenly. Place on the prepared board and allow to continue softening.

Step 13

Build Roll Layers: Distribute about 2–3 tablespoons of cooled rice or noodles on the bottom third of the softened wrapper. Top with 2–3 tablespoons of the cooled beef mixture, cucumber strips, carrot strips, lettuce, cilantro, basil, and mint leaves.

Step 14

Roll and Seal: Fold the bottom edge of the wrapper over the filling. Fold in both sides, then roll tightly away from you to form a neat cylinder. Ensure the seam is secure.

Step 15

Set Finished Rolls: Place each completed roll seam-side down on a serving plate. Repeat the process with remaining wrappers and filling until all rolls are assembled.

Step 16

Serve: Serve rolls whole or sliced diagonally. Present immediately with the prepared dipping sauce. If storing, cover with a damp towel and plastic wrap and refrigerate for up to 2–3 hours. Allow rolls to reach room temperature for 10–15 minutes before serving.

What you'll need

  • Large skillet or wok
  • Mixing bowls
  • Sharp knife and cutting board
  • Shallow dish or pan for water
  • Clean board or large plate for rolling
  • Tongs or chopsticks
  • Spatula for breaking apart beef

Allergy notice

Check each ingredient for allergens and get medical advice if you're unsure.
  • Contains fish from fish sauce
  • Contains soy from soy sauce and oyster sauce
  • May contain shellfish depending on oyster sauce brand
  • Contains wheat unless using certified gluten-free sauces
  • Always verify product labels for allergen content and cross-contamination risks

Nutritional info (per serving)

Nutrition info is meant to guide only—it's not a replacement for professional medical input.
  • Calories: 125
  • Fats: 5 g
  • Carbohydrates: 12 g
  • Proteins: 8 g